Installing hMailServer
BACK
Please note: My mirror may not be the most up-to-date file. You are best visiting the official site for the latest versions.
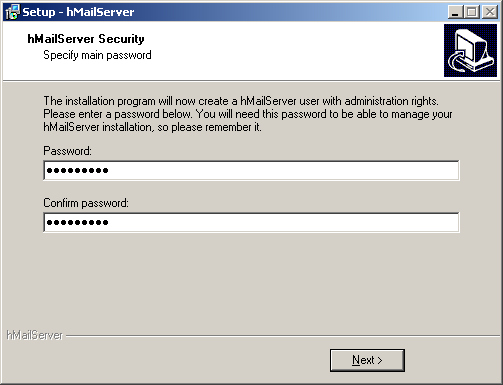
On this screen you need to enter a password. This password is to protect hMailServer from outside connections via its API interface. Enter a password you will remember as you will need it again later.
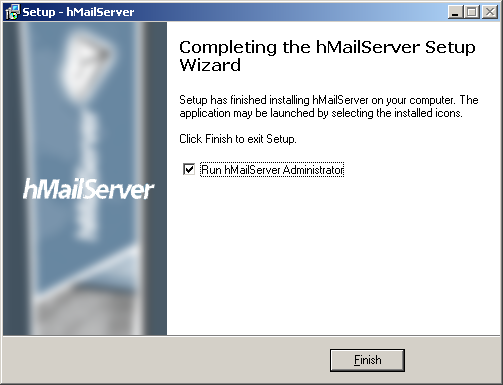
The installation is finished. Click Finish to start the server.
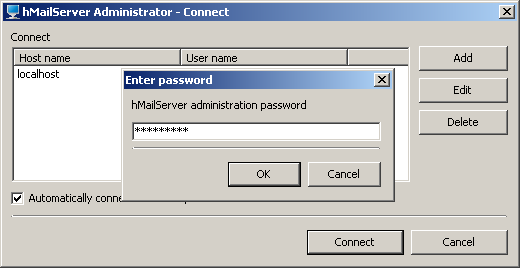
You should get this screen next. Here you enter the password you chose earlier in the installation. Once you have entered it, click "OK".
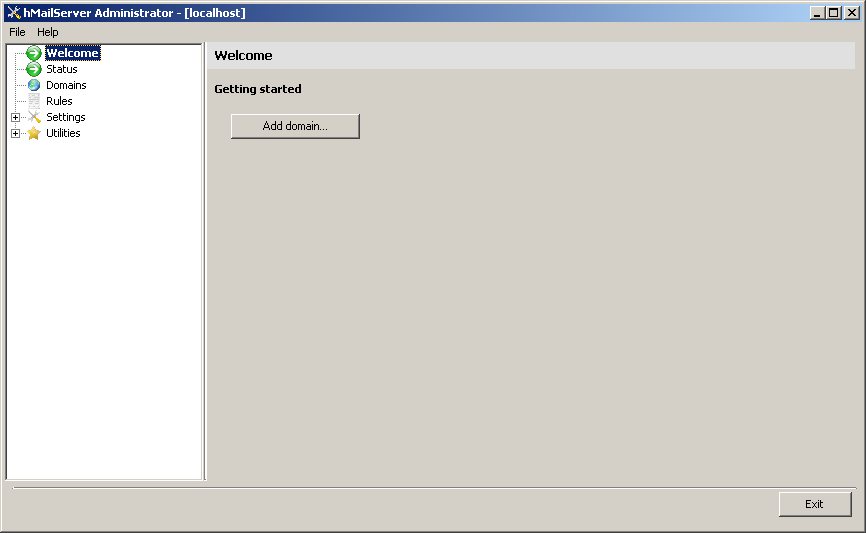
This is the welcome screen inside hMailServer. This is where we begin the configuring.
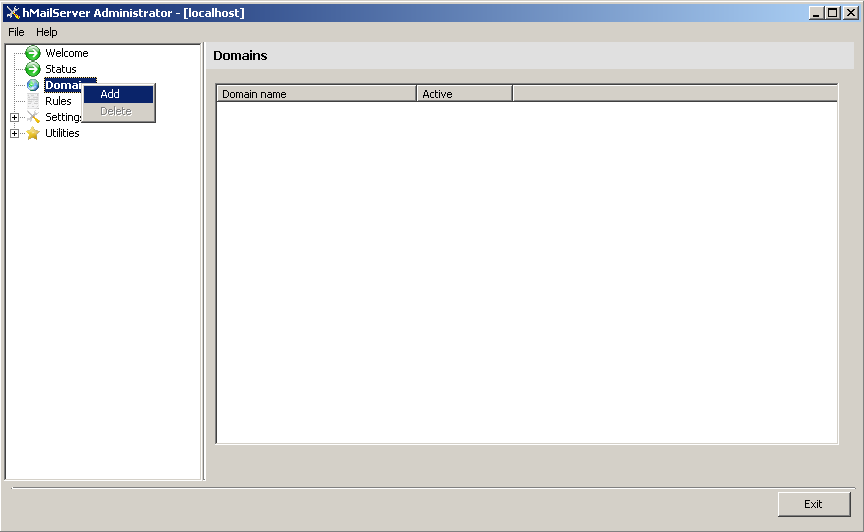
First, right click on "Domains" on the left hand side, and select "Add".
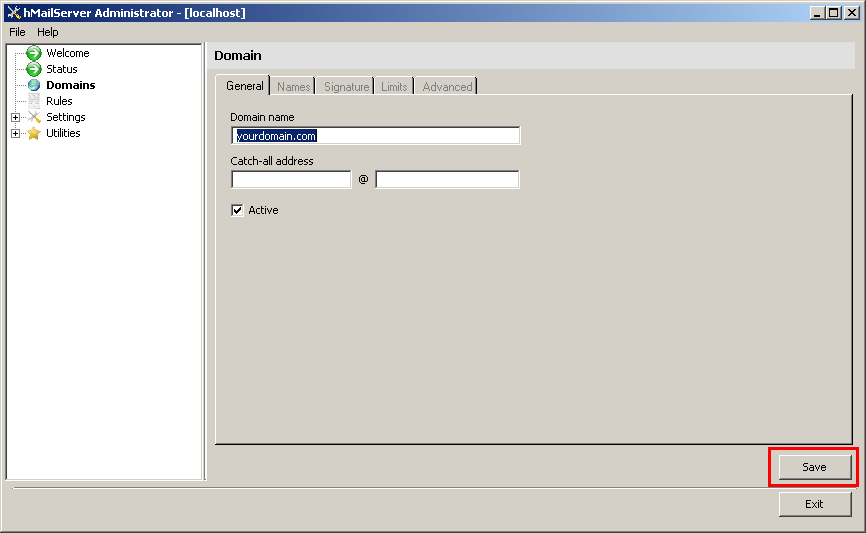
Next, enter your domain name into the highlighted box, the click "Save".
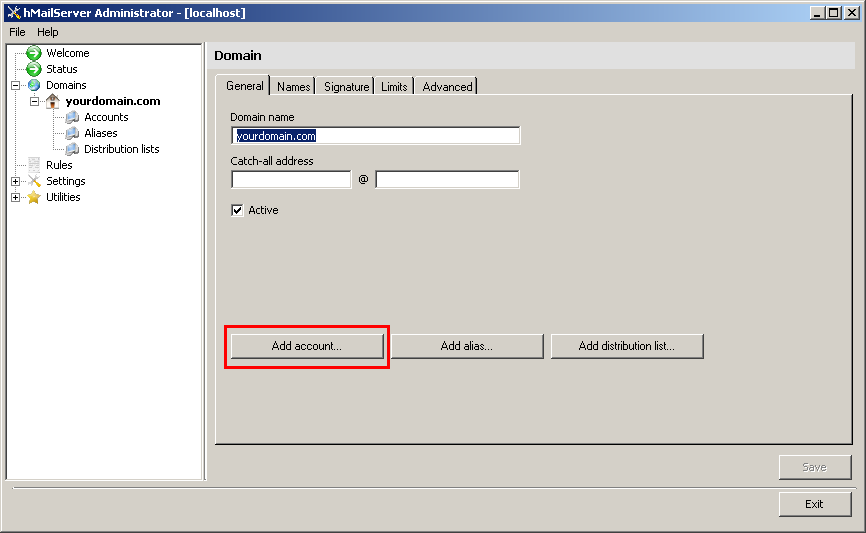
After clicking save, more options will appear. Click on the "Add account..." button.
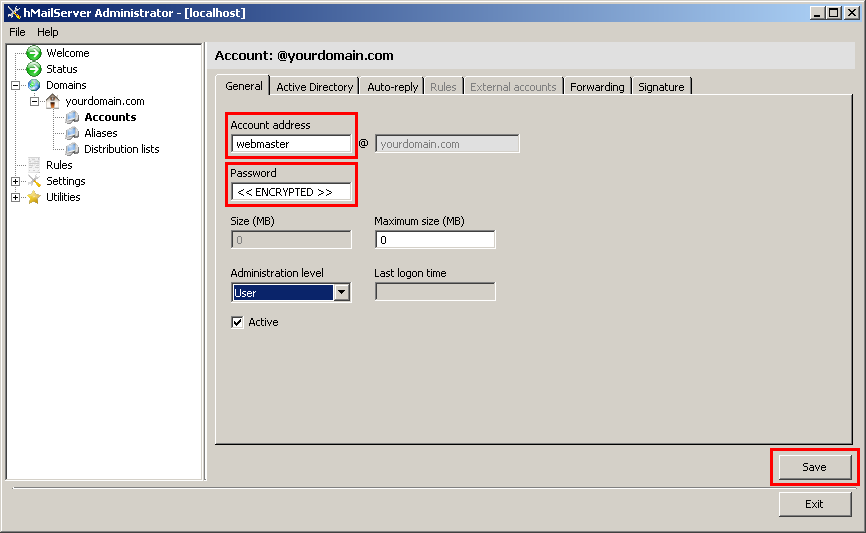
On this screen, enter a name for your e-mail account. It can be something like your name, or webmaster. It cannot contain special characters. Also, enter a password where it says "<< ENCRYPTED >>". Once you have entered the password, click "Save". The password will turn back into "<< ENCRYPTED >>".
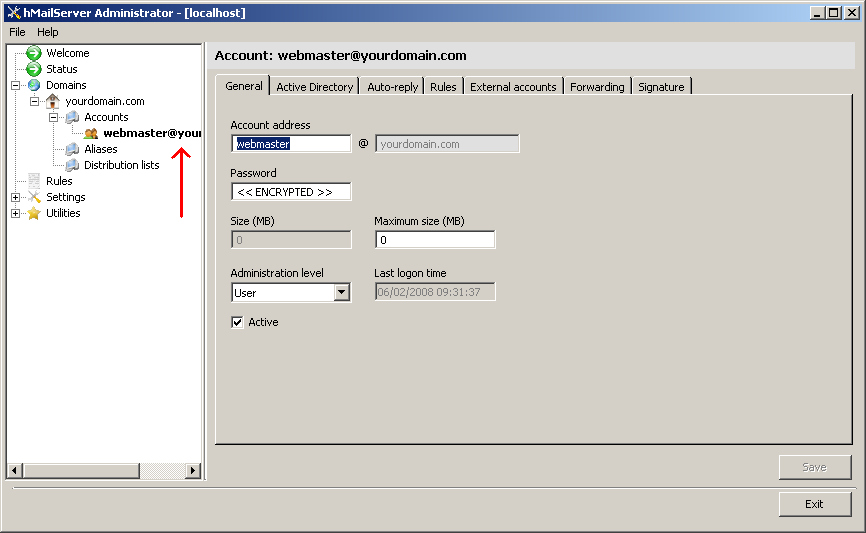
After clicking save, the account name you just made will appear on the left (above the arrow).
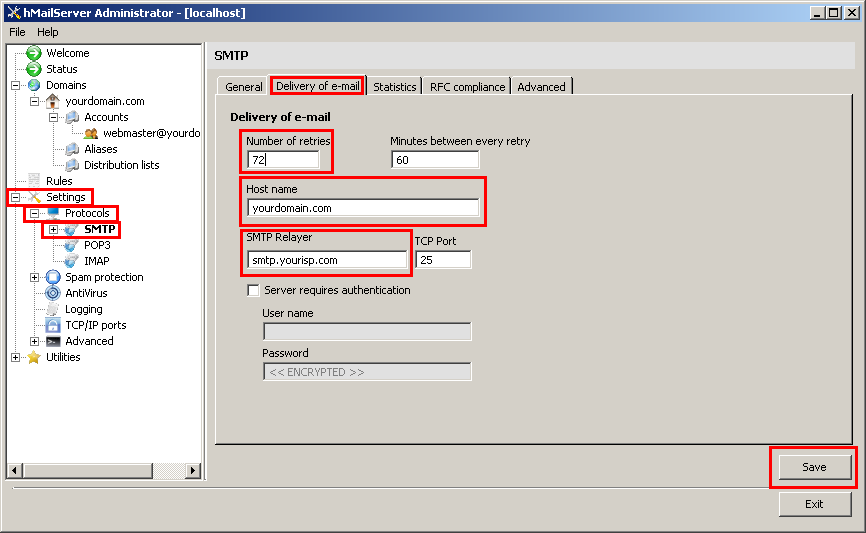
Next, click "Setting" and it will expand. Then click "Protocols" and it will expand. Then click "SMTP". On the right, click "Delivery of e-mail" tab. Change the number of retries box to "72". This is so the server will retry sending any e-mails 72 times, once every 60 minutes, making it try to send the e-mail for 3 days before giving up. In the "Host Name" box, enter your domain name, but excluding the "www.".
The SMTP Relayer box is only necessary if:-
1. You have a dynamic IP
2. No configurable rDNS (reverse DNS)
3. Both of the above
If you are on standard broadband, there is a 99% one of the above statements is true.
What you enter here, you will have to find out yourself. Usually it is something along the lines of "smtp.yourisp.com" or "mail.yourisp.com" but you will have to check. If you have a Gmail account, you can use your Gmail SMTP details, and enter in your account details as it will require authentication.
Note: Without a relayer, anyone with a dynamic IP and/or no configurable rDNS will NOT be able to send e-mail.
Once you have entered the details, click "Save".
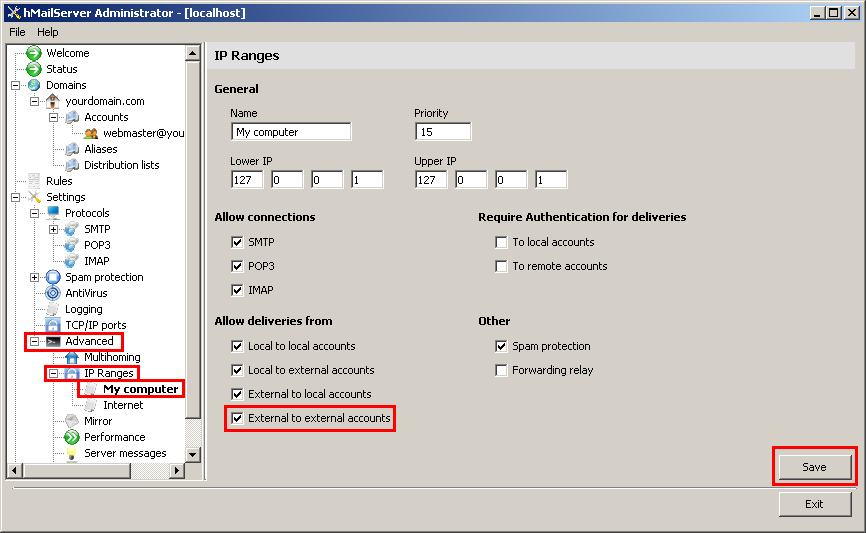
On the left, click "Advanced" and it will expand. Then click "IP Ranges" and it will expand. Then click "My Computer". On the right, check the box labelled "External to external accounts" and click "Save". This modification is necessary because you may put smtp.yourdomain.com into your php.ini, which means when you send an e-mail out, its an 'external to external' e-mail. If this is not ticked it will reject the e-mail.
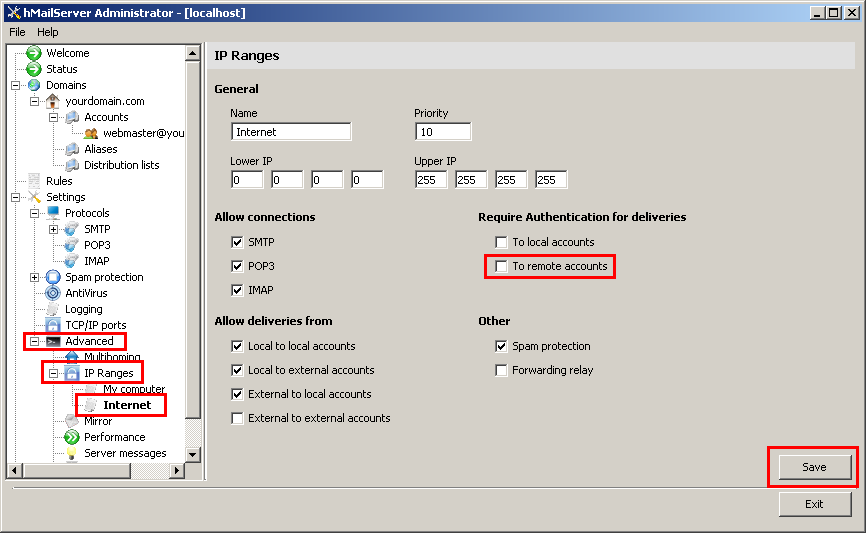
Next, click "Internet" on the left, underneath "My Computer" which we clicked in the last step. On the right, un-check "To remote accounts" and then click "Save". This modification is necessary because services like Gmail as you to login before you can send them an e-mail. Its a very weird one that I haven't quite understood myself but un-checking this solves it.
Thats it! hMailServer is installed. We now need to make your DNS records so when mail is sent to your e-mail address, it knows what to do.
Every DNS control panel is different, but I am going to demonstrate how to do it for the AbyssUnderground.co.uk domain in my control panel.
In your control panel for your domain, you need to add a new DNS record. This will be an MX record, the records used for directing mail to the correct server.
In the screenshot below, you can see how the data would be entered.
Name: Leave this blank, as it has no relevance in an MX record.
Type: MX Record. This defines it as a mail exchanger record.
Data: This is where you enter your IP, or your no-ip/dyndns domain name if your IP is dynamic. Note: Some hosts require you put a "." (period) at the end of hostnames! Check if this is the case with your host.
TTL: Time To Live. This by default is 600 seconds (10 minutes) with my DNS host.
AUX: This is the priority of the mail exchanger. You can have more than one exchanger for redundancy but this won't be covered in this tutorial.
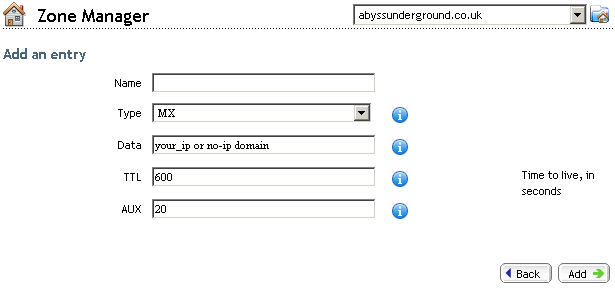
Once you have entered the details above, click "Add" and the entry should be added. Check the entry carefully as DNS changes can take up to 72 hours to become fully effective globally.
Remember to forward ports 25 and 110 so the server can work and you can retrieve your mail.
Please read the following points to ensure you get your server working and understand some complications you may have.
Thats it! Your mail server should now be functioning.
Tips on getting online
Change the Index File
Installing Abyss Web Server
Installing a DNS Server
Installing Filezilla FTP Server
Installing MySQL Database Server v4.0.24
Installing ActiveState Perl
Installing PHP
Installing phpMyAdmin
Installing ActiveState Python
Installing ActiveState Ruby on Rails
Or go back to the AbyssUnderground homepage
Step 1: Downloading
Before we start you need to download the hMailServer installer. You can get it from http://hmailserver.com/?page=downloadPlease note: My mirror may not be the most up-to-date file. You are best visiting the official site for the latest versions.
Step 2: Installing
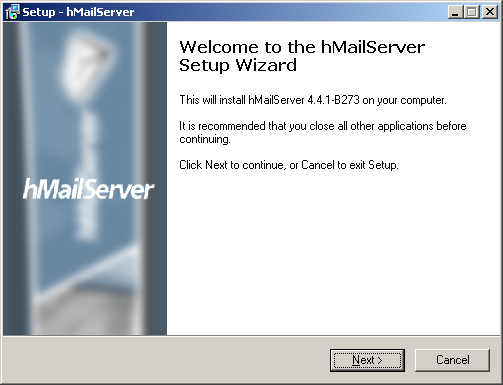
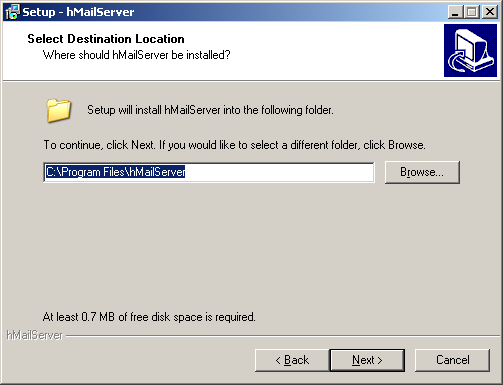
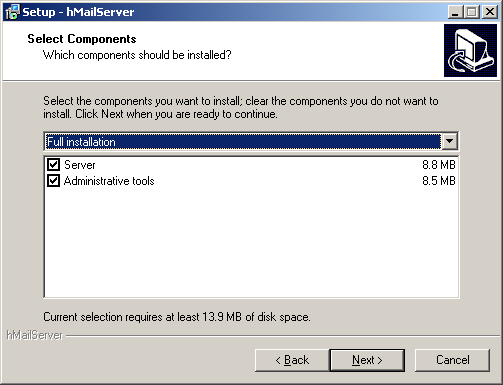
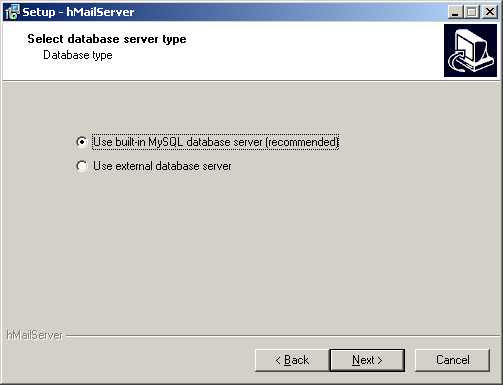
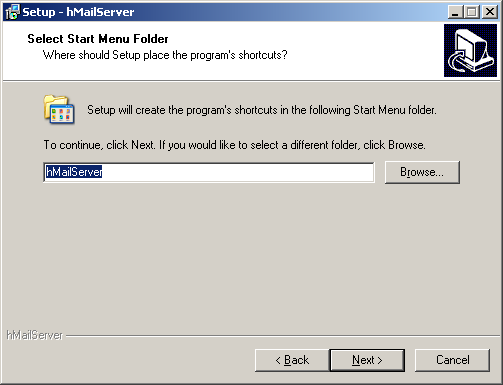
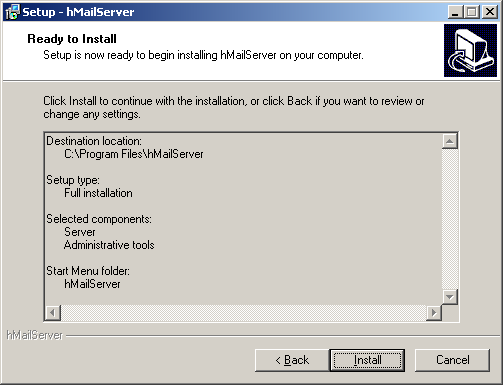
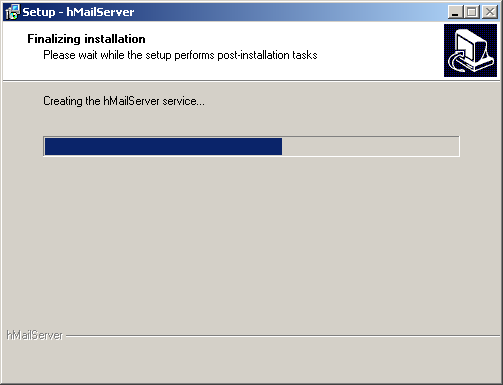
Double click the installation file and you will be presented with the following screen. Click next on all of the screens shown below.


On this screen you need to enter a password. This password is to protect hMailServer from outside connections via its API interface. Enter a password you will remember as you will need it again later.

The installation is finished. Click Finish to start the server.

Step 3: Configuring the server
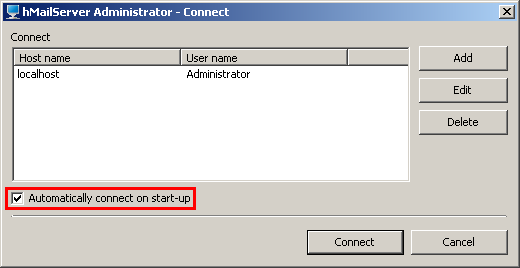
On this screen, it allows you to connect to hMailServer. Check the "Automatically connect on start-up" checkbox, and then click "Connect".
You should get this screen next. Here you enter the password you chose earlier in the installation. Once you have entered it, click "OK".

This is the welcome screen inside hMailServer. This is where we begin the configuring.

First, right click on "Domains" on the left hand side, and select "Add".

Next, enter your domain name into the highlighted box, the click "Save".

After clicking save, more options will appear. Click on the "Add account..." button.

On this screen, enter a name for your e-mail account. It can be something like your name, or webmaster. It cannot contain special characters. Also, enter a password where it says "<< ENCRYPTED >>". Once you have entered the password, click "Save". The password will turn back into "<< ENCRYPTED >>".

After clicking save, the account name you just made will appear on the left (above the arrow).

Next, click "Setting" and it will expand. Then click "Protocols" and it will expand. Then click "SMTP". On the right, click "Delivery of e-mail" tab. Change the number of retries box to "72". This is so the server will retry sending any e-mails 72 times, once every 60 minutes, making it try to send the e-mail for 3 days before giving up. In the "Host Name" box, enter your domain name, but excluding the "www.".
The SMTP Relayer box is only necessary if:-
1. You have a dynamic IP
2. No configurable rDNS (reverse DNS)
3. Both of the above
If you are on standard broadband, there is a 99% one of the above statements is true.
What you enter here, you will have to find out yourself. Usually it is something along the lines of "smtp.yourisp.com" or "mail.yourisp.com" but you will have to check. If you have a Gmail account, you can use your Gmail SMTP details, and enter in your account details as it will require authentication.
Note: Without a relayer, anyone with a dynamic IP and/or no configurable rDNS will NOT be able to send e-mail.
Once you have entered the details, click "Save".

On the left, click "Advanced" and it will expand. Then click "IP Ranges" and it will expand. Then click "My Computer". On the right, check the box labelled "External to external accounts" and click "Save". This modification is necessary because you may put smtp.yourdomain.com into your php.ini, which means when you send an e-mail out, its an 'external to external' e-mail. If this is not ticked it will reject the e-mail.

Next, click "Internet" on the left, underneath "My Computer" which we clicked in the last step. On the right, un-check "To remote accounts" and then click "Save". This modification is necessary because services like Gmail as you to login before you can send them an e-mail. Its a very weird one that I haven't quite understood myself but un-checking this solves it.

Thats it! hMailServer is installed. We now need to make your DNS records so when mail is sent to your e-mail address, it knows what to do.
Every DNS control panel is different, but I am going to demonstrate how to do it for the AbyssUnderground.co.uk domain in my control panel.
In your control panel for your domain, you need to add a new DNS record. This will be an MX record, the records used for directing mail to the correct server.
In the screenshot below, you can see how the data would be entered.
Name: Leave this blank, as it has no relevance in an MX record.
Type: MX Record. This defines it as a mail exchanger record.
Data: This is where you enter your IP, or your no-ip/dyndns domain name if your IP is dynamic. Note: Some hosts require you put a "." (period) at the end of hostnames! Check if this is the case with your host.
TTL: Time To Live. This by default is 600 seconds (10 minutes) with my DNS host.
AUX: This is the priority of the mail exchanger. You can have more than one exchanger for redundancy but this won't be covered in this tutorial.

Once you have entered the details above, click "Add" and the entry should be added. Check the entry carefully as DNS changes can take up to 72 hours to become fully effective globally.
Remember to forward ports 25 and 110 so the server can work and you can retrieve your mail.
Please read the following points to ensure you get your server working and understand some complications you may have.
IMPORTANT!!
- If you host this server on broadband, because of limitations with dynamic IP's and rDNS configurations, a large marjority of mail servers will ignore your servers presence and will NOT deliver mail destined for any domains you host. Please take into consideration that 100% of mail sent to you will NOT be delivered in most cases.
- If your server goes offline, or you turn it off, mail will not be collected, so you may never get it if the other server does not keep retrying.
- You will need to forward ports 25 and 110 (SMTP and POP). You may also wish to forward port 143 (IMAP). This MUST be done in order for the server to function.
- To retrieve your mail, you can use clients such as Outlook Express or any free webmail scripts. You can then connect using your domain name. Login's are the same as your e-mail address.
Thats it! Your mail server should now be functioning.
Finished
Related Pages
Tips on getting online
Change the Index File
Installing Abyss Web Server
Installing a DNS Server
Installing Filezilla FTP Server
Installing MySQL Database Server v4.0.24
Installing ActiveState Perl
Installing PHP
Installing phpMyAdmin
Installing ActiveState Python
Installing ActiveState Ruby on Rails
Or go back to the AbyssUnderground homepage